
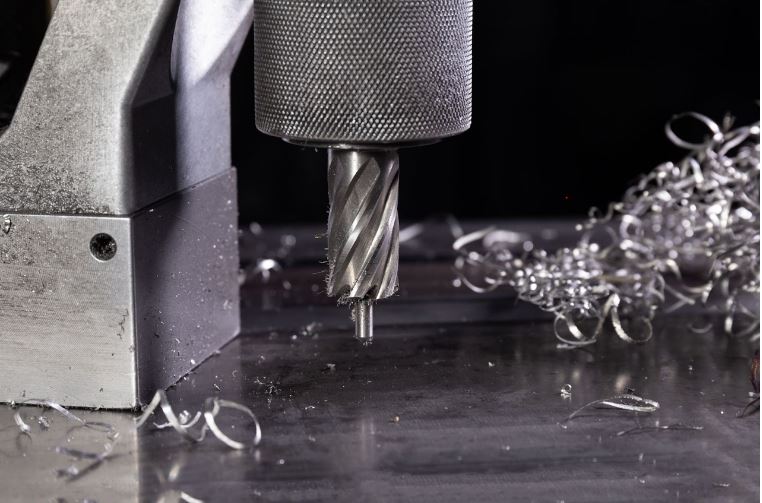
CNC-Bearbeitungsfräser
Wenn Sie schon einmal mit der Hand über eine frisch bearbeitetes Teil Wenn Sie eine scharfe Kante spüren, die Ihre Haut berührt, haben Sie den Feind getroffen: den Grat. Auf den ersten Blick sieht er wie ein winziger Fehler aus, doch bei der Bearbeitung sind Grate mehr als nur ein kosmetisches Ärgernis. Sie können die Montagezeit verkürzen, die Kosten in die Höhe treiben und im schlimmsten Fall ein Sicherheitsrisiko für jeden darstellen, der das Teil bearbeitet.
Was ist Grat bei der spanenden Bearbeitung? Man kann es sich als unerwünschte Reste des Schneidprozesses vorstellen: die ausgefransten Kanten, dünnen Splitter oder erhabenen Grate, die nach dem Schneiden, Bohren oder Fräsen des Materials entstehen. Sie bereiten Ingenieuren und Maschinenbauern gleichermaßen Kopfzerbrechen, denn ein nicht richtig entgratetes Teil kann in einer Baugruppe verklemmen, unter Belastung versagen oder sogar einen Techniker verletzen.
Genau deshalb ist die Gratkontrolle bei Präzisionsarbeiten so wichtig. Wir wissen, wie gratempfindliche Projekte über Erfolg oder Misserfolg von Produktionsläufen entscheiden können. Deshalb legen wir auf die Kantenqualität den gleichen Wert wie auf Toleranzen. Und da unsere Kupfer-, Stahl- und Aluminiumbearbeitung bereits ab 1 US-Dollar pro Teil möglich ist, können selbst kleine Werkstätten knifflige Aufträge auslagern und erhalten präzise und sicher zu handhabende Teile.
(Wissenschaft direkt)
Ein Grat ist ein unerwünschtes Stück überschüssigen Materials, das nach einem Schneidvorgang an einem Werkstück haftet. Genauer gesagt entsteht er, wenn das Werkzeug das Material drückt oder zerreißt, anstatt es sauber abzuschneiden. Das Ergebnis ist eine erhabene Kante, eine dünne Lasche oder eine winzige gezackte Lippe, die nicht Teil Ihres CAD-Modells war, nun aber da ist und beseitigt werden muss.
Bearbeitungsgrate findet man in der Regel an den üblichen Stellen: an scharfen Kanten, in Bohrungen, am Ende von Schlitzen oder sogar um Gewinde herum. Grundsätzlich ist überall dort, wo das Werkzeug aus dem Schnitt austritt, ein idealer Ort für die Gratbildung. Manche sind kaum wahrnehmbar, andere können so scharf sein, dass sie einen Handschuh aufschneiden oder eine Baugruppe beschädigen.
Und das Schlimmste: Grate sind nicht nur ein oberflächliches Ärgernis. Sie können die Maßgenauigkeit und Oberflächenqualität beeinträchtigen, weshalb das Entgraten bei Präzisionsarbeiten fast immer ein notwendiger Arbeitsschritt ist.
Nicht alle Grate sehen gleich aus. Die Kenntnis des Typs hilft bei der Wahl der richtigen Entfernungsmethode. Hier ist eine kurze Übersicht über die gängigsten Bearbeitungsgrate:
| Fräsertyp | Wo es auftaucht | Was ist los |
| Poisson-Frässtifte | Entlang der Kanten beim Schneiden von duktilen Metallen | Verursacht durch plastische Verformung, die das Material seitwärts drückt |
| Roll-Over-Frässtifte | Fräsen, Bohrenund Schlitzbearbeitungen | Der Werkzeugausgang hinterlässt eine gekräuselte Materialklappe |
| Ausbruchfräser | Austrittsseite der Bohrlöcher | Material reißt statt sauber zu scheren |
| Trennfräser | Drehen von Abstech- oder Trennvorgängen | Beim Trennen des Teils durch das Werkzeug bleibt zusätzliches Material zurück |
Jeder dieser Punkte kann zu Problemen führen. Ein winziger Poisson-Grat kann die Oberflächenbeschaffenheit ruinieren, während ein dicker Rollgrat eine Baugruppe blockieren oder Ihre Hand aufschneiden kann.
(Intechopen)
Man könnte meinen, Grate seien nur kosmetischer Natur. Doch sie können weit über das Aussehen hinaus Probleme verursachen. Hier erfahren Sie, warum sie wichtig sind:
| Wirkungsbereich | Wie Grate es beeinflussen |
| Montagetoleranzen | Schon ein kleiner Grat kann dazu führen, dass Teile nicht mehr sauber zusammenpassen |
| Ermüdungslebensdauer | Grate wirken als Spannungserhöher und verkürzen die Lebensdauer eines Bauteils |
| Sicherheit | Scharfe Gratkanten können Bediener oder Endbenutzer verletzen |
| Nachbearbeitungskosten | Zusätzliche Entgratungsschritte = höherer Zeit- und Kostenaufwand |
In Branchen mit hohem Einsatz genügt ein einziger Ausrutscher. Ein einziger Grat kann zur Ablehnung von Teilen führen. Luft- und Raumfahrt oder medizinische Anwendungen, wo die Sicherheitsmargen hauchdünn sind. Und auch außerhalb dieser Bereiche möchte kein Kunde ein „fertiges“ Teil, das unfertig aussieht.
Die Methode zum Entfernen von Graten bei der CNC-Bearbeitung hängt von der Teilegeometrie, dem Material und der gewünschten Reinheit der Oberfläche ab. Hier ein kurzer Überblick über die wichtigsten Ansätze:
Die altmodische Methode: Handfeilen, Schaber, Schleifpapier oder Drahtbürsten. Günstig und flexibel, aber langsam und bei Produktionsläufen nicht konsistent.
Techniken wie Vibrations-Taumeln oder Schleifräder sind in Werkstätten üblich, in denen viele kleinere Teile in Chargen bearbeitet werden müssen. Gut zum Glätten von Kanten, aber nicht immer präzise.
Wird auch als „explosives Entgraten“ bezeichnet. Die Teile werden in eine abgedichtete Kammer gegeben, ein Gasgemisch gezündet und Grate buchstäblich weggebrannt. Funktioniert gut bei inneren Graten an schwierigen Stellen, ist aber nicht für jedes Material das schonendste Verfahren.
Bei dieser Methode werden ein Elektrolyt und elektrischer Strom verwendet, um Grate an engen Stellen, wie z. B. Querbohrungen oder Hydraulikkomponenten, aufzulösen. Präzise, erfordert aber eine sorgfältige Vorbereitung.
Hier setzen moderne Werkstätten an. Eine Entgratungsmaschine entfernt Grate automatisch mit Schleifbürsten, Rotationsköpfen oder CNC-integrierten Werkzeugen. Das Ergebnis: schnellere Bearbeitung, weniger Ermüdung des Bedieners und ein gleichmäßigeres Ergebnis.
| Verfahren | Vorteile | Nachteile |
| Traditionell (manuell / mechanisch) | Geringe Einstiegskosten, flexibel für Sonderteile | Arbeitsintensiv, inkonsistent, zeitaufwendig |
| Automatisiert (Fräsmaschinen) | Hohe Geschwindigkeit, wiederholbare Ergebnisse, ideal für die Produktion | Höhere Vorabkosten, erfordert ordnungsgemäße Einrichtung |
Wenn heute über die Effizienz einer Werkstatt gesprochen wird, sind Entgratmaschinen und Entgratungsmaschinen fast immer die Rede. Diese Systeme kombinieren Schleifköpfe, Rotationswerkzeuge oder sogar CNC-Aufsätze, um das Entgraten von einem Engpass zu einem reibungslosen Arbeitsablauf zu machen.
| Maschinenmerkmal | Was es bewirkt | Warum es wichtig ist |
| Schleifbürsten | Grate an Kanten und Flächen wegfegen | Hinterlässt ein gleichmäßiges Finish ohne schwere Arbeit |
| Rotationswerkzeuge | Zielen Sie auf Grate in Schlitzen, Rillen oder kleinen Merkmalen | Ideal für komplexe Teilegeometrien |
| CNC-integriertes Entgraten | Werkzeugwege beinhalten Entgratungsdurchgänge | Spart Rüstzeit und reduziert die manuelle Handhabung |
Vorteile auf einen Blick: schnellere Zykluszeiten, wiederholbare Qualität und weniger Stunden, die der Bediener mit einer Feile über einem Schraubstock gebeugt verbringt.
Wir haben die fortschrittliche Entgratung direkt in unseren Arbeitsablauf integriert. Das bedeutet, dass Sie bei gratempfindlichen Aufträgen nicht nur saubere Toleranzen erhalten, sondern auch sofort montagefertige Teile. Und mit Leistungen ab nur 1 US-Dollar pro Teil ist es ein Kinderspiel, die Schwerstarbeit den Maschinen (und unserem Team) zu überlassen.
Es ist immer günstiger und einfacher, die Bildung von Graten zu verhindern, als sie später stundenlang zu entfernen. Mit ein paar bewährten Vorgehensweisen in der Fertigung können Sie viel erreichen:
Grate mögen wie kleine Mängel aussehen, können aber zu echten Problemen führen: Sie verursachen zusätzliche Kosten für die Endbearbeitung, Toleranzprobleme, Sicherheitsrisiken und können manchmal zur vollständigen Ausschussware führen. Die Lösung besteht nicht nur darin, die Grate anschließend zu entgraten. Es geht darum zu wissen, wann Grate an der Quelle vermieden werden müssen und wann die richtige Entgratungsmaschine für die Beseitigung eingesetzt werden muss.
Wir decken beides ab: Präzisionsbearbeitung, die die Gratbildung minimiert, und automatisiertes Entgraten für den Rest. Das Ergebnis sind produktionsreife, sicherere und zuverlässigere Teile. Und das schon ab nur 1 US-Dollar pro Komponente, das Outsourcing gratempfindlicher Arbeiten war noch nie so einfach
 ABONNIEREN SIE UNSEREN NEWSLETTER
WHATSAPP : +86-15375471059
E-Mail : allan@safekeso.com
Telefonnummer : +86 15375471059